
During one of our Members Mini evenings Jeremy presented a Photoshop processing technique that he’d learned on a tutorial by Canadian landscape photographer Tristan Todd.
The technique is a way to brighten specific parts of an image without losing colour or contrast. It involves painting on a brighter version of a colour already in the image and uses a ‘luminosity mask’ (a tool to select parts of the image that are a particular brightness) so that the adjustment can be applied very accurately.
Here is a step by step guide to the technique:
1. Create a New blank Layer
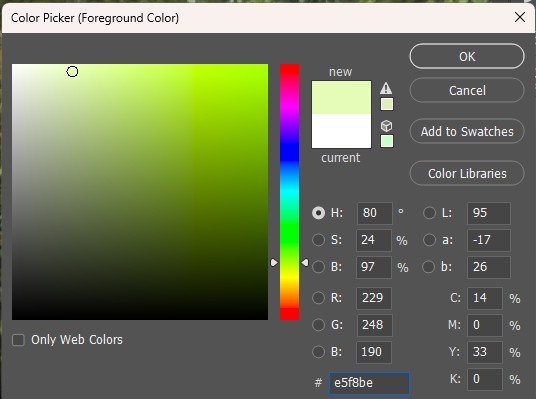
2. Sample the colour from the part of the subject you wish to brighten: – click on foreground colour to open up the colour picker. Your mouse pointer should now be an eyedropper. Sample from your subject by clicking on it with the eyedropper and the colour will be shown in the Colour Picker box. Choose a brighter version of this colour by clicking at the very top of the box (approx. a quarter way in from the left tends to work well in most cases but you can choose a less or more saturated version by clicking more to L or R if you wish)
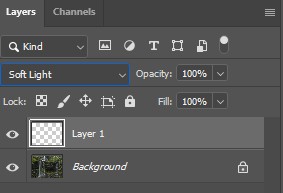
3. Change the blend mode of this new layer to Soft Light
The next stage is to create a luminosity mask so we can use this to paint our colour on only where we want it to go
4. Open the Channels panel and Ctrl/Cmd-click the RGB layer (creates a selection from this layer)
5. Save the selection as a new channel by clicking the icon at the bottom of the channels panel (‘save selection as new layer’). Deactivate the selection (Ctrl-D)
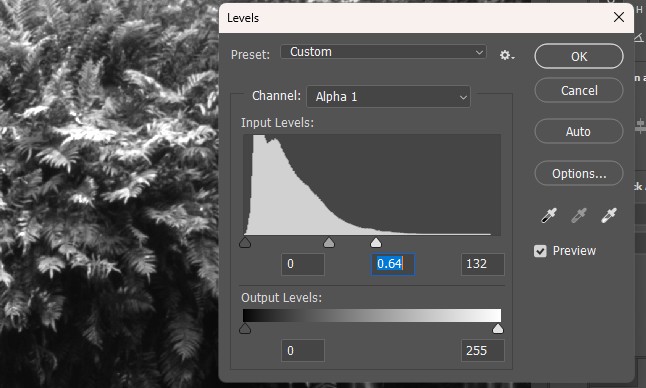
6. Apply a Levels adjustment to this new channel layer (Ctrl/Cmd-L). Increase the contrast in the area we wish to paint on by moving the right hand ‘white point’ arrow to the left and the midpoint arrow to the right. Click OK
7. Ctrl/Cmd-click this layer to load it as a selection
8. Go back the layers panel and click on the layer we will be painting on to make it active
9. Hide the ‘marching ants’ showing the selection if you wish by Ctrl/Cmd-H. The selection will still be active but is hidden. (Don’t forget to deactivate it afterwards)
10. Using a brush with opacity 50-100% as needed paint over the area you wish to adjust.
By using soft light blend mode and a luminosity mask based on a channel you should find that the brighter colour is painted on very naturally only on the area you want to apply it and not onto surrounding darker areas. So you don’t have to be too accurate with your brush. It is possible to build up the effect exactly where you want it allowing you total artistic control of the effect.
Jeremy demonstrated its use in brightening parts of leaves and moss aswell as lines of water in a waterfall inorder to bring these areas out and give a more 3 dimensional feel to the image, but it is a useful technique that can applied to many similar situations.